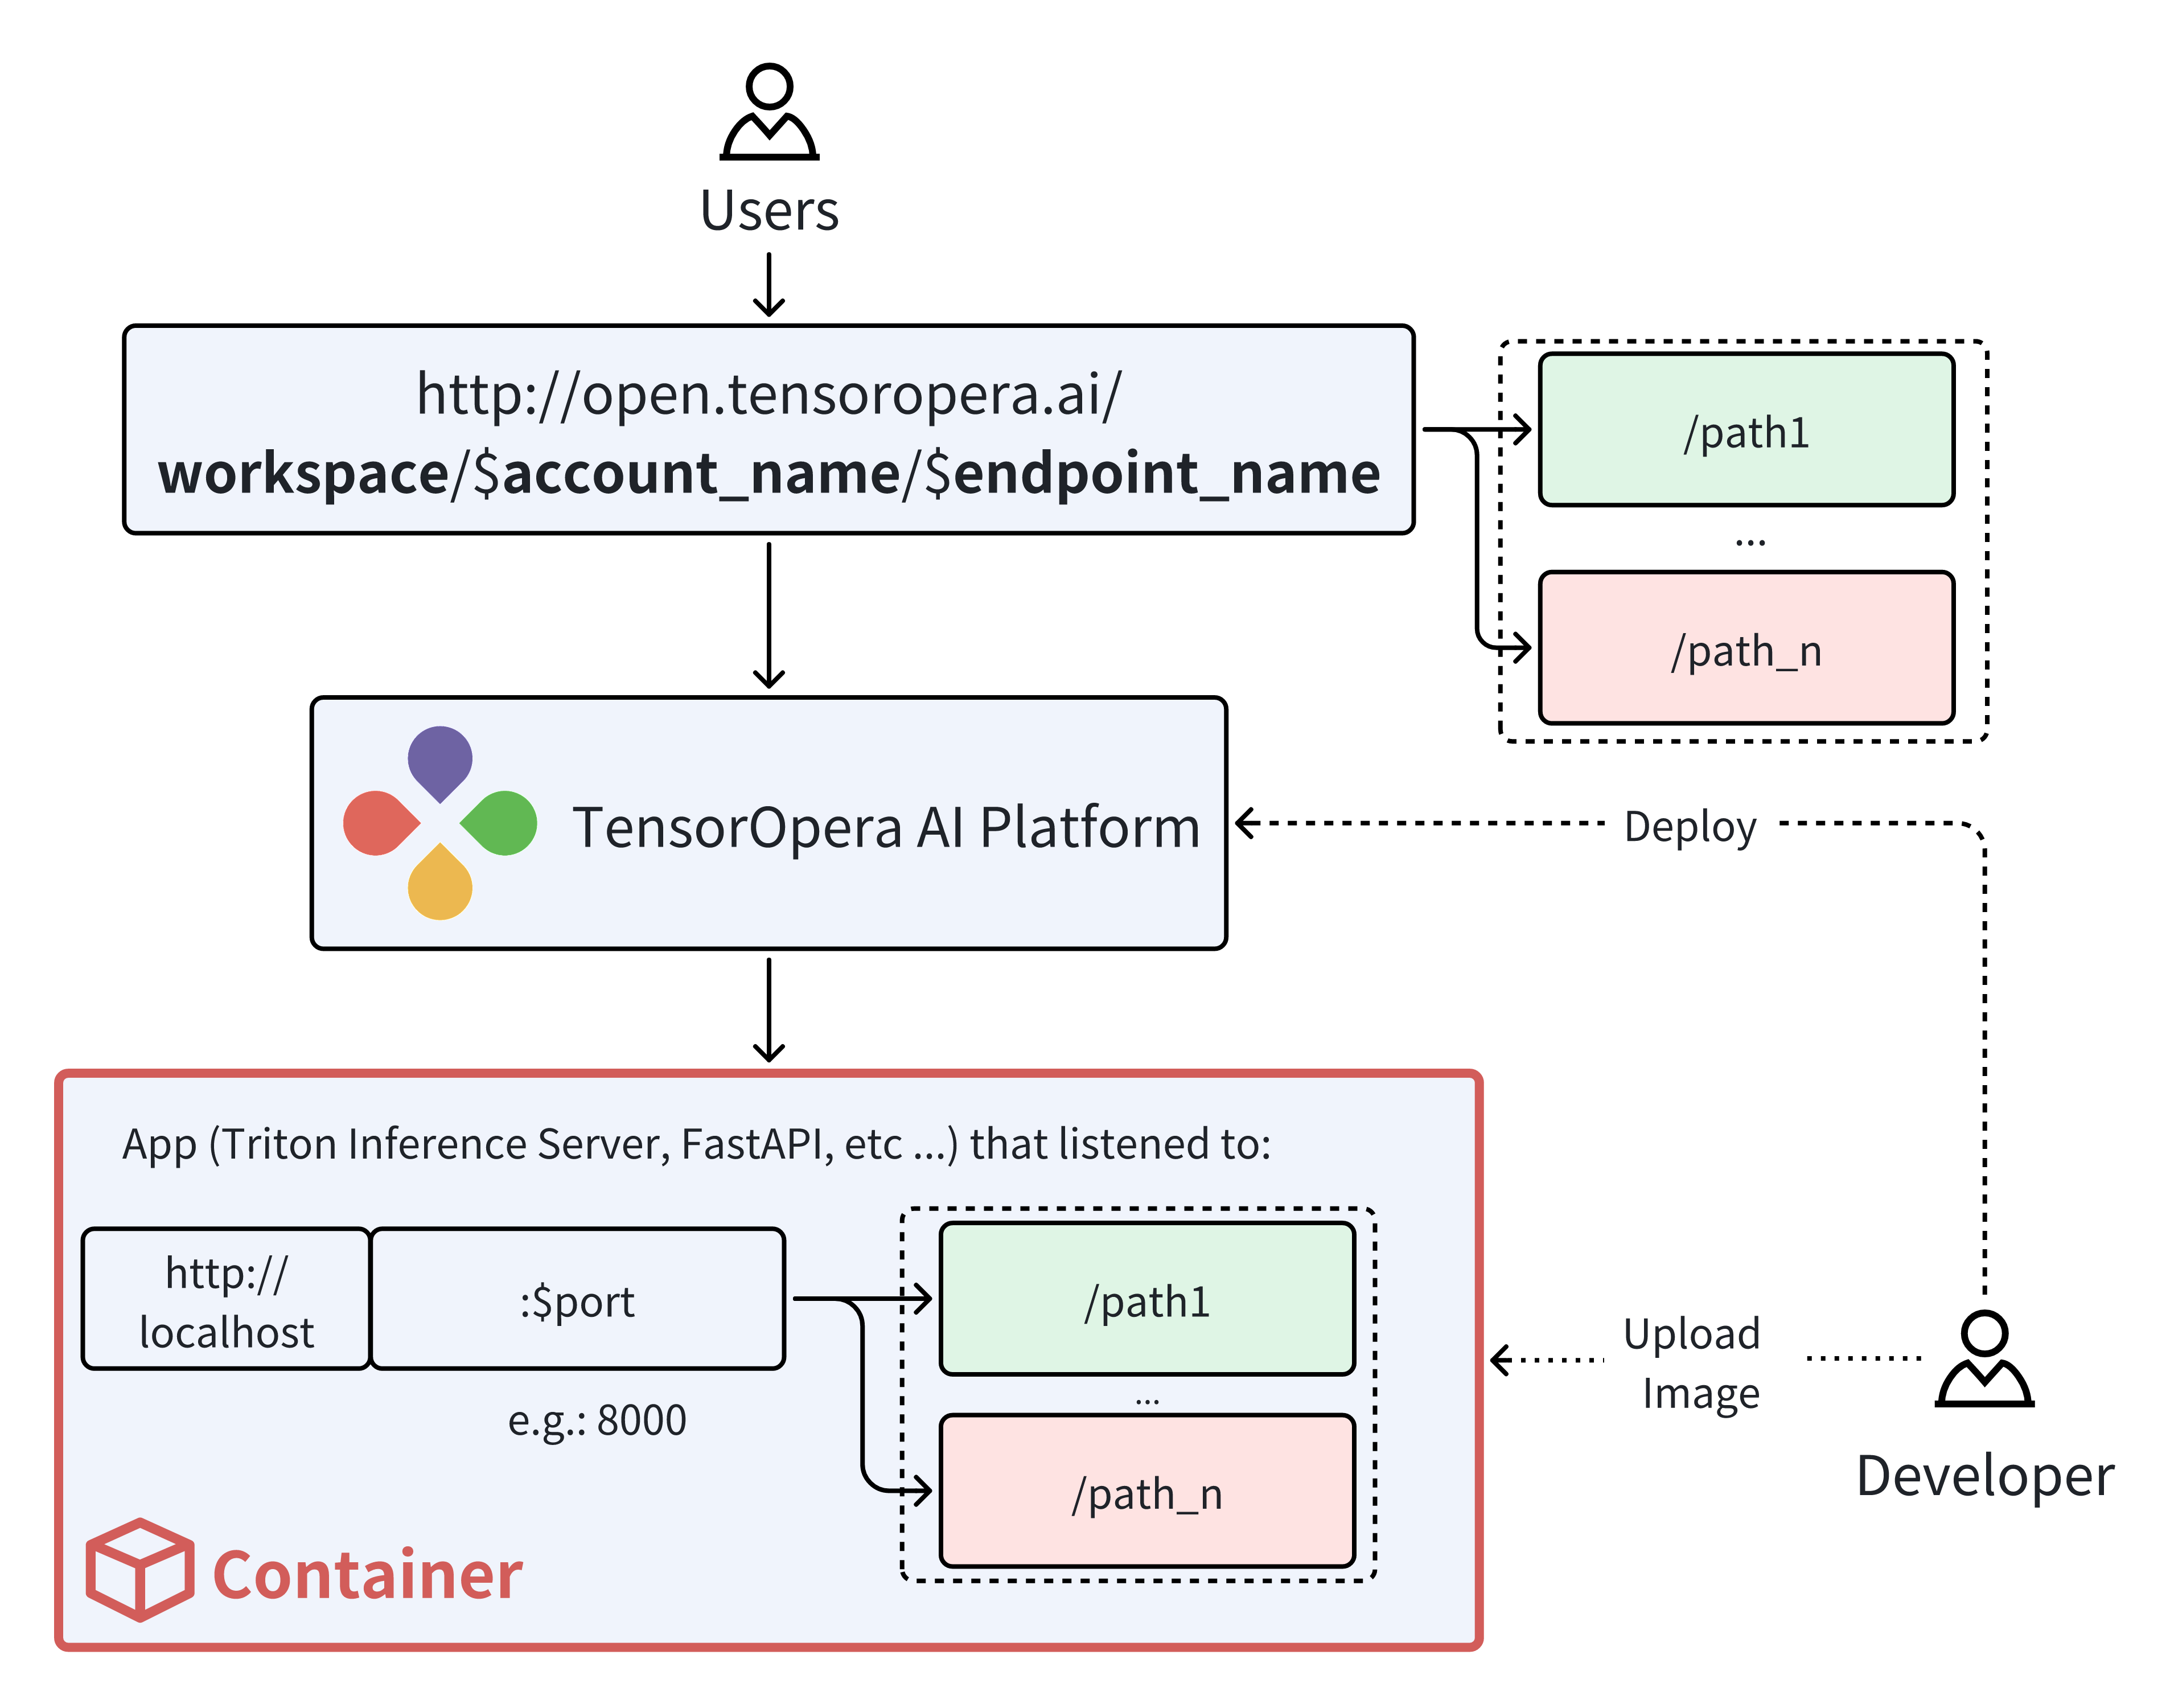
Custom Container Integration
This tutorial will guide you through the process of creating a local model card using a customized Docker image from DockerHub and deploying the model card to a serverless GPU cloud.
This tutorial assume you have an App containerized in a Docker image, and you want to create a model card for it. If you haven't has that App containerized, you can follow the Create a Model Card tutorial to create a model card from a model config file.
Prerequisites
Install fedml, the serving library provided by TensorOpera AI, on your machine.
pip install fedml
Create a model card using a configuration file
Suppose you have a docker image on DockerHub that is ready for serving. You can create a model card by providing a configuration file. The configuration file should contain the following fields:
# Example config.yaml
inference_image_name: 'nvcr.io/nvidia/tritonserver:24.05-py3' # str, Docker image name
container_run_command: 'tritonserver --model-repository=/repo_inside_container' # str or list, similar to CMD in the dockerfile, or docker run command.
port: 8000 # int, service port, currently you can only indicate one arbitrary port.
expose_subdomains: true # bool, set to true route all the subdomains, set to true. e.g. localhost:2345/{all-subdomain}.
workspace: './' # str, pacakge other files in the workspace to the model card. e.g. README.md
readiness_probe: # dict, the readiness probe configuration.
  httpGet:
    path: '/v2/health/ready'
Use fedml model create command to create a model card on your local machine.
fedml model create -n $my_model_name -cf config.yaml
Deploy the model to a Serverless GPU Cloud
Before you start, you will need to create an account on TensorOpera AI.
Use fedml model push to push the model card to TensorOpera AI Cloud. Replace $api_key with your own API key. The API Key can be found from the profile page.
fedml model push -n hf_model -k $api_key
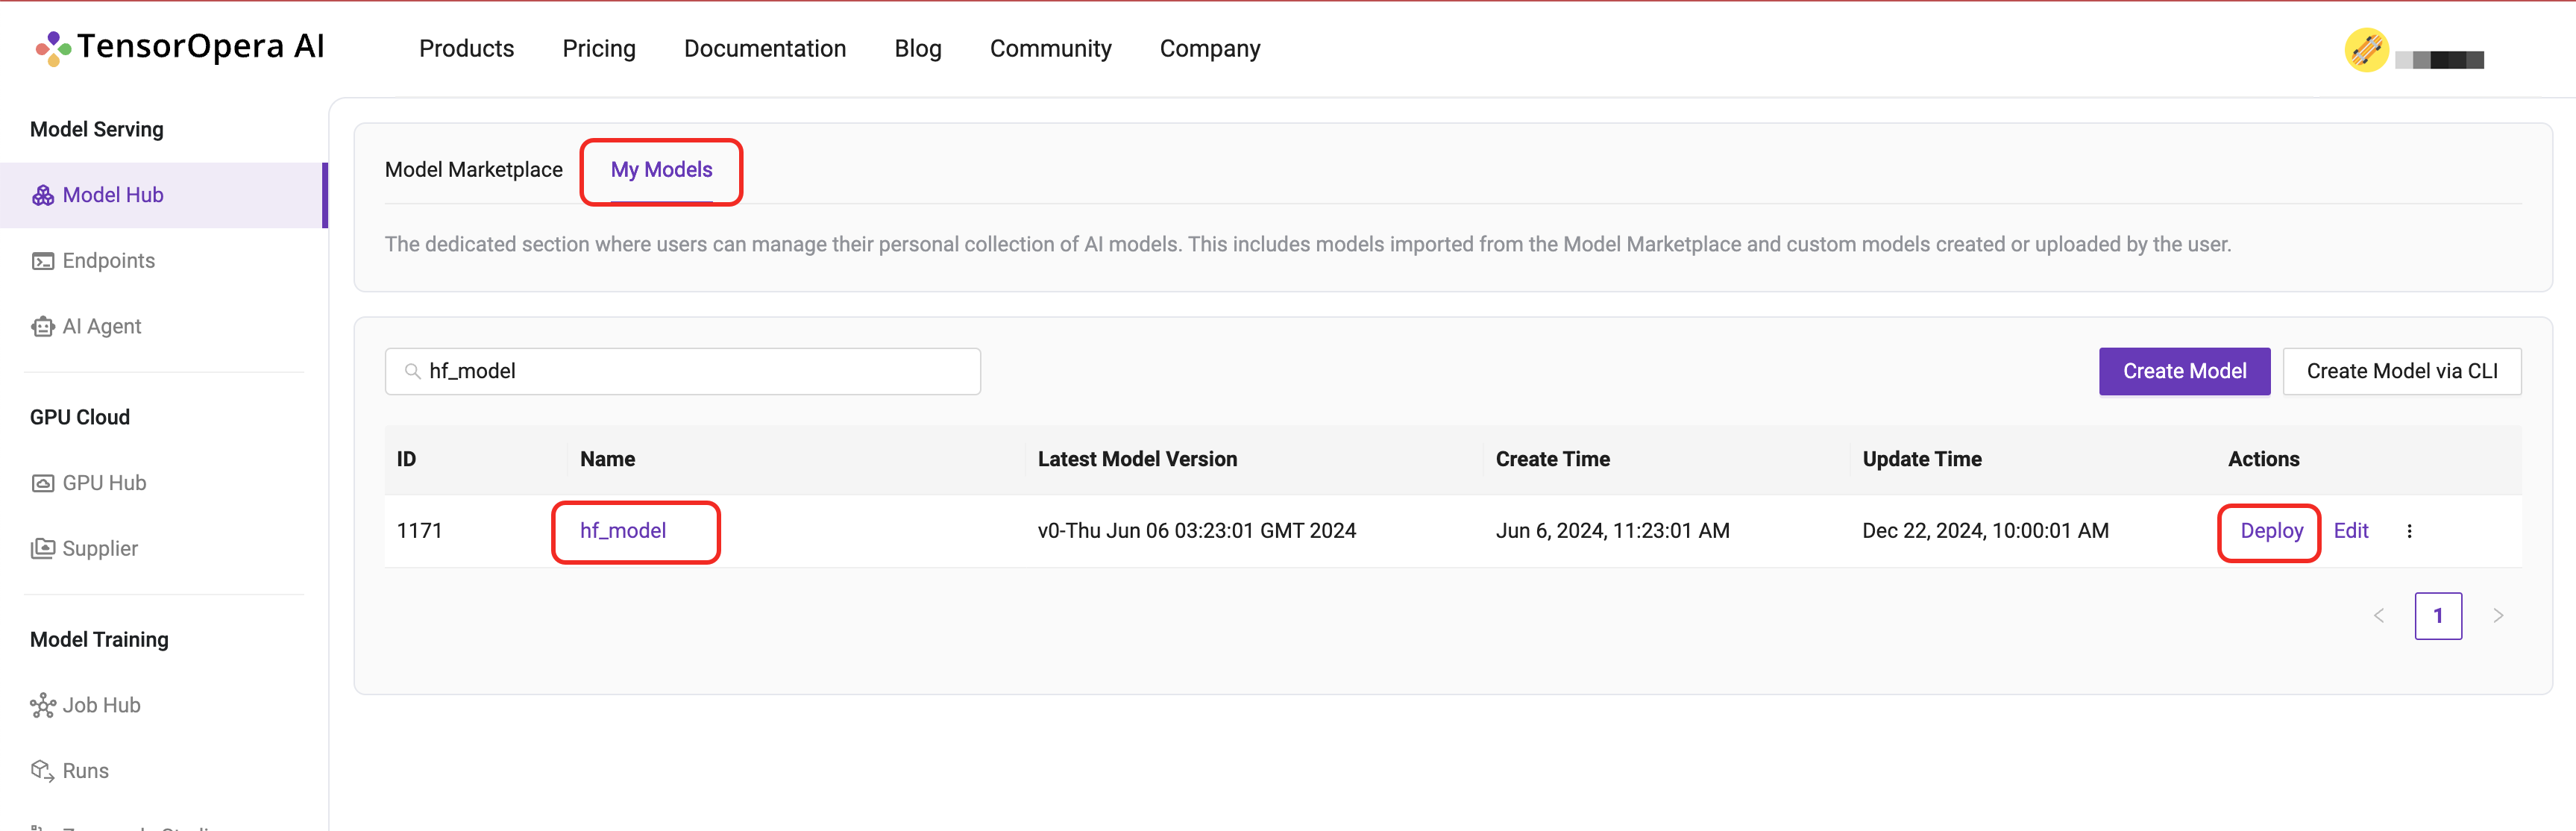
After you push the model card to TensorOpera AI Cloud, you can deploy the model by going to the
Model Serving -> Model Hub -> My Models tab on the TensorOpera AI Platform dashboard.
Click the Deploy button to deploy the model.
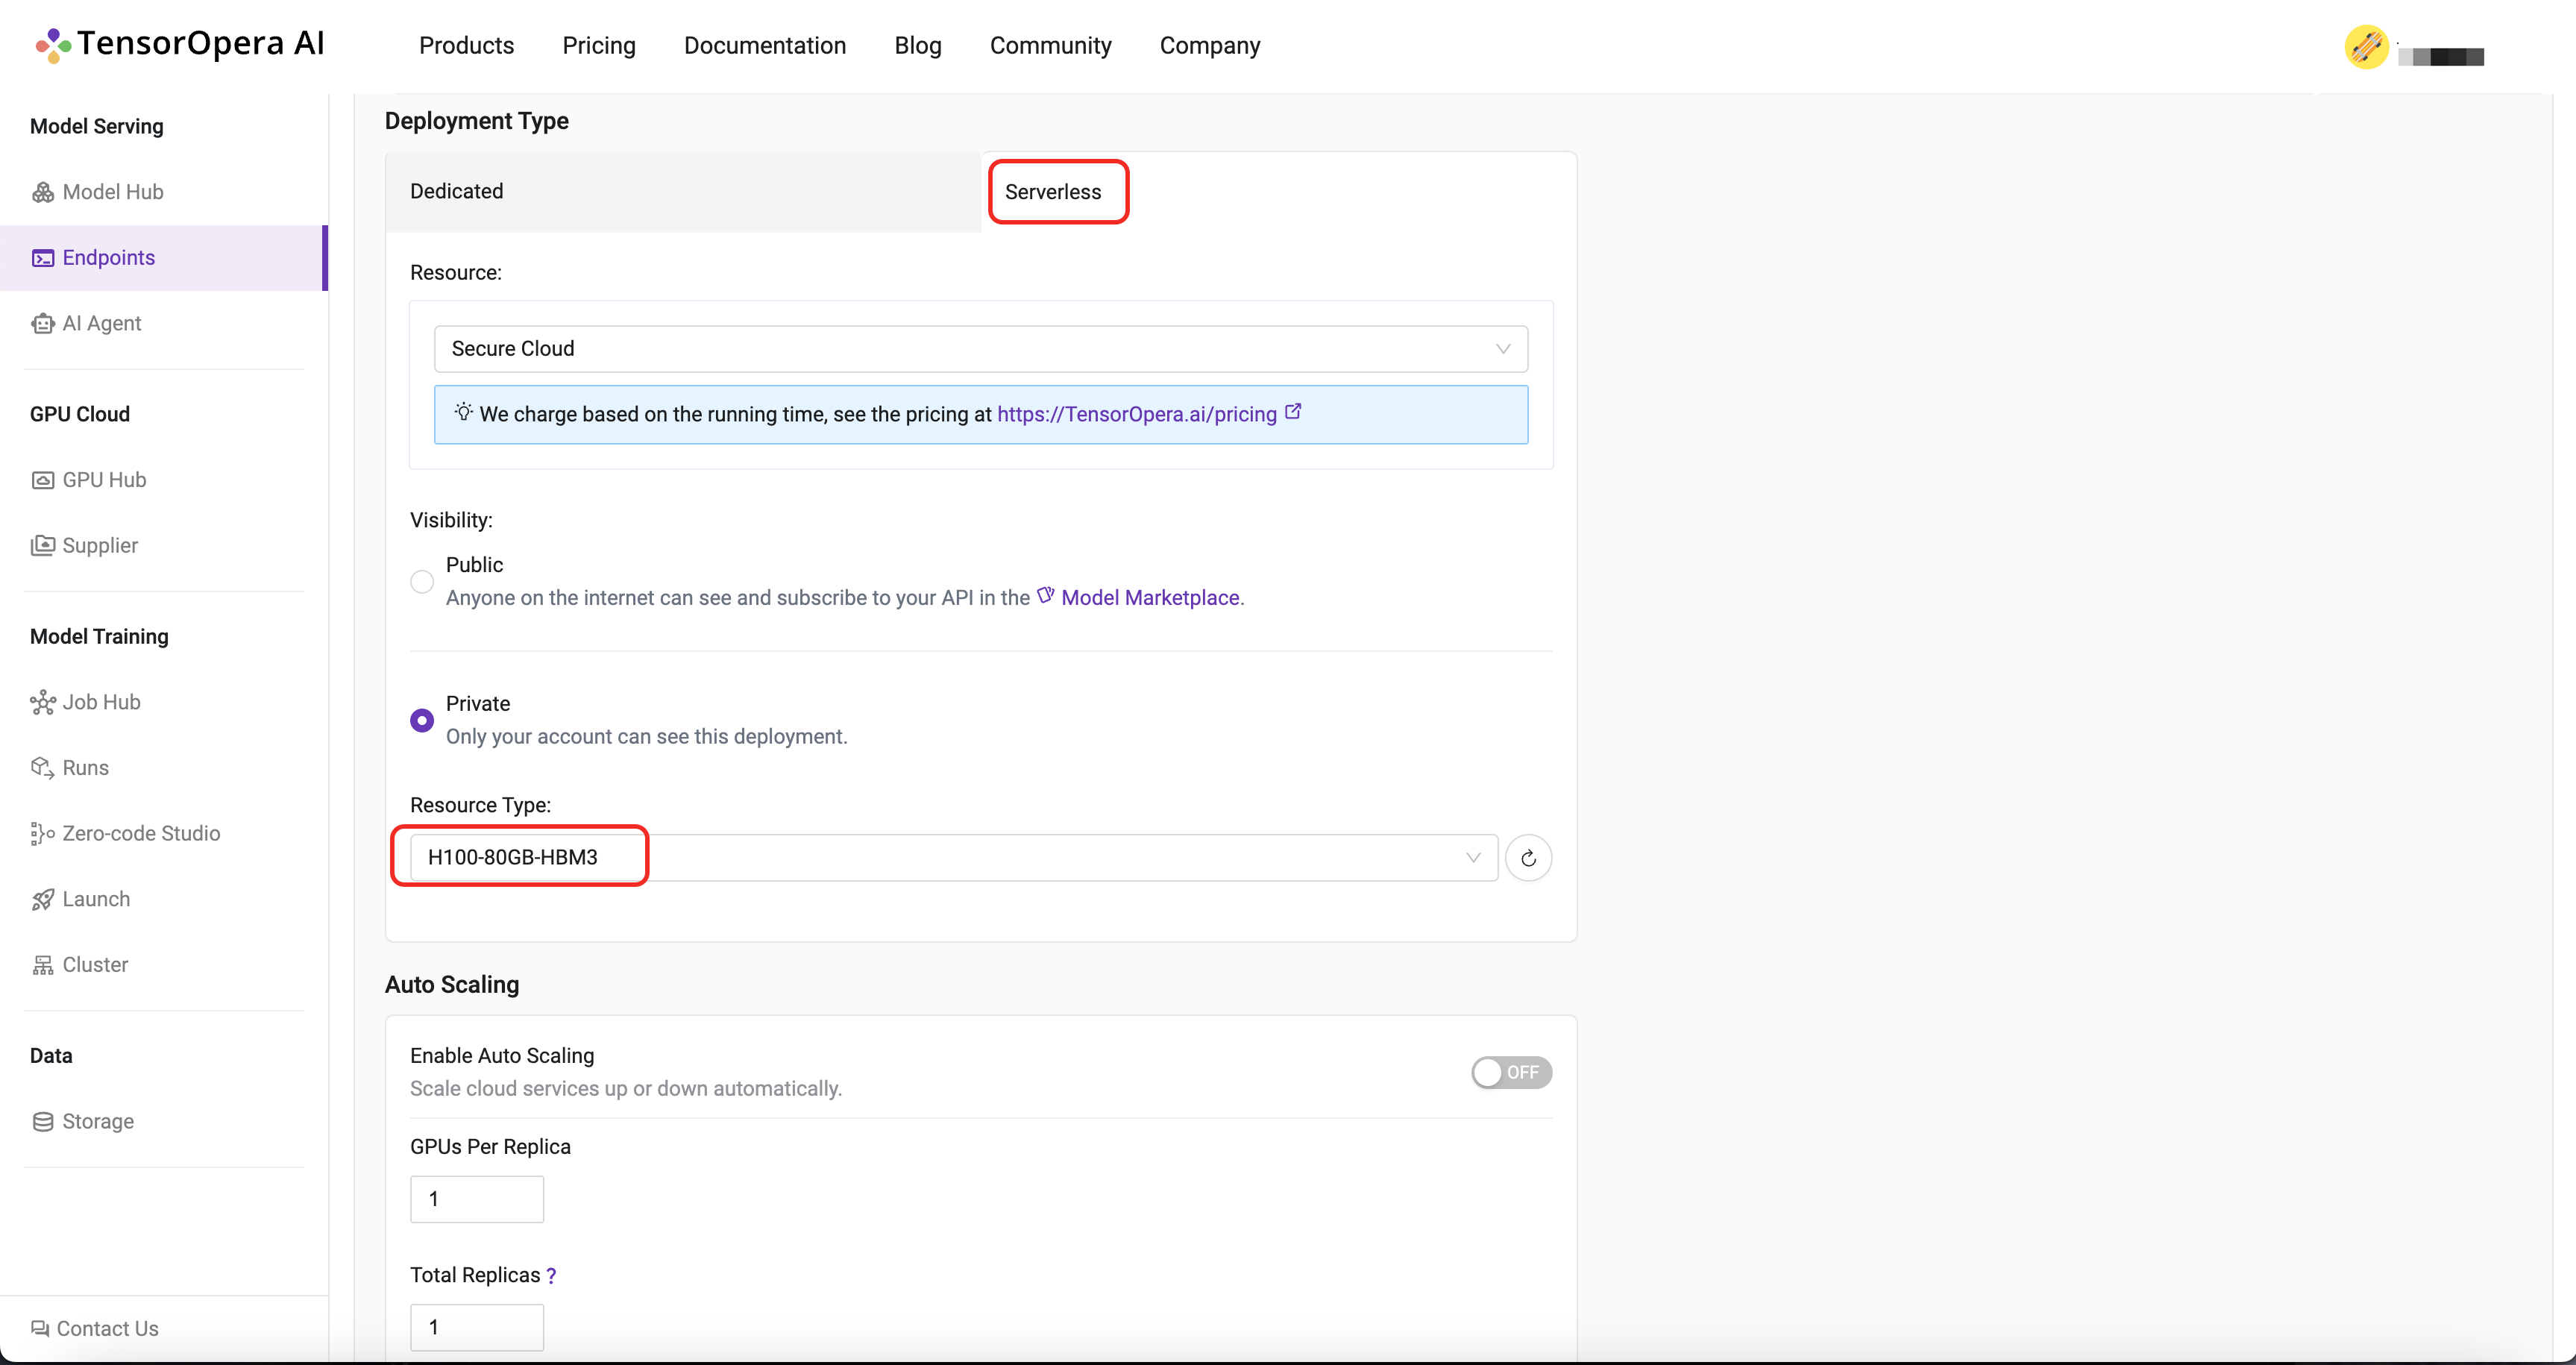
For this quick start tutorial, we can select the Serverless H100-80GB-HBM3 option and click the Deploy button.
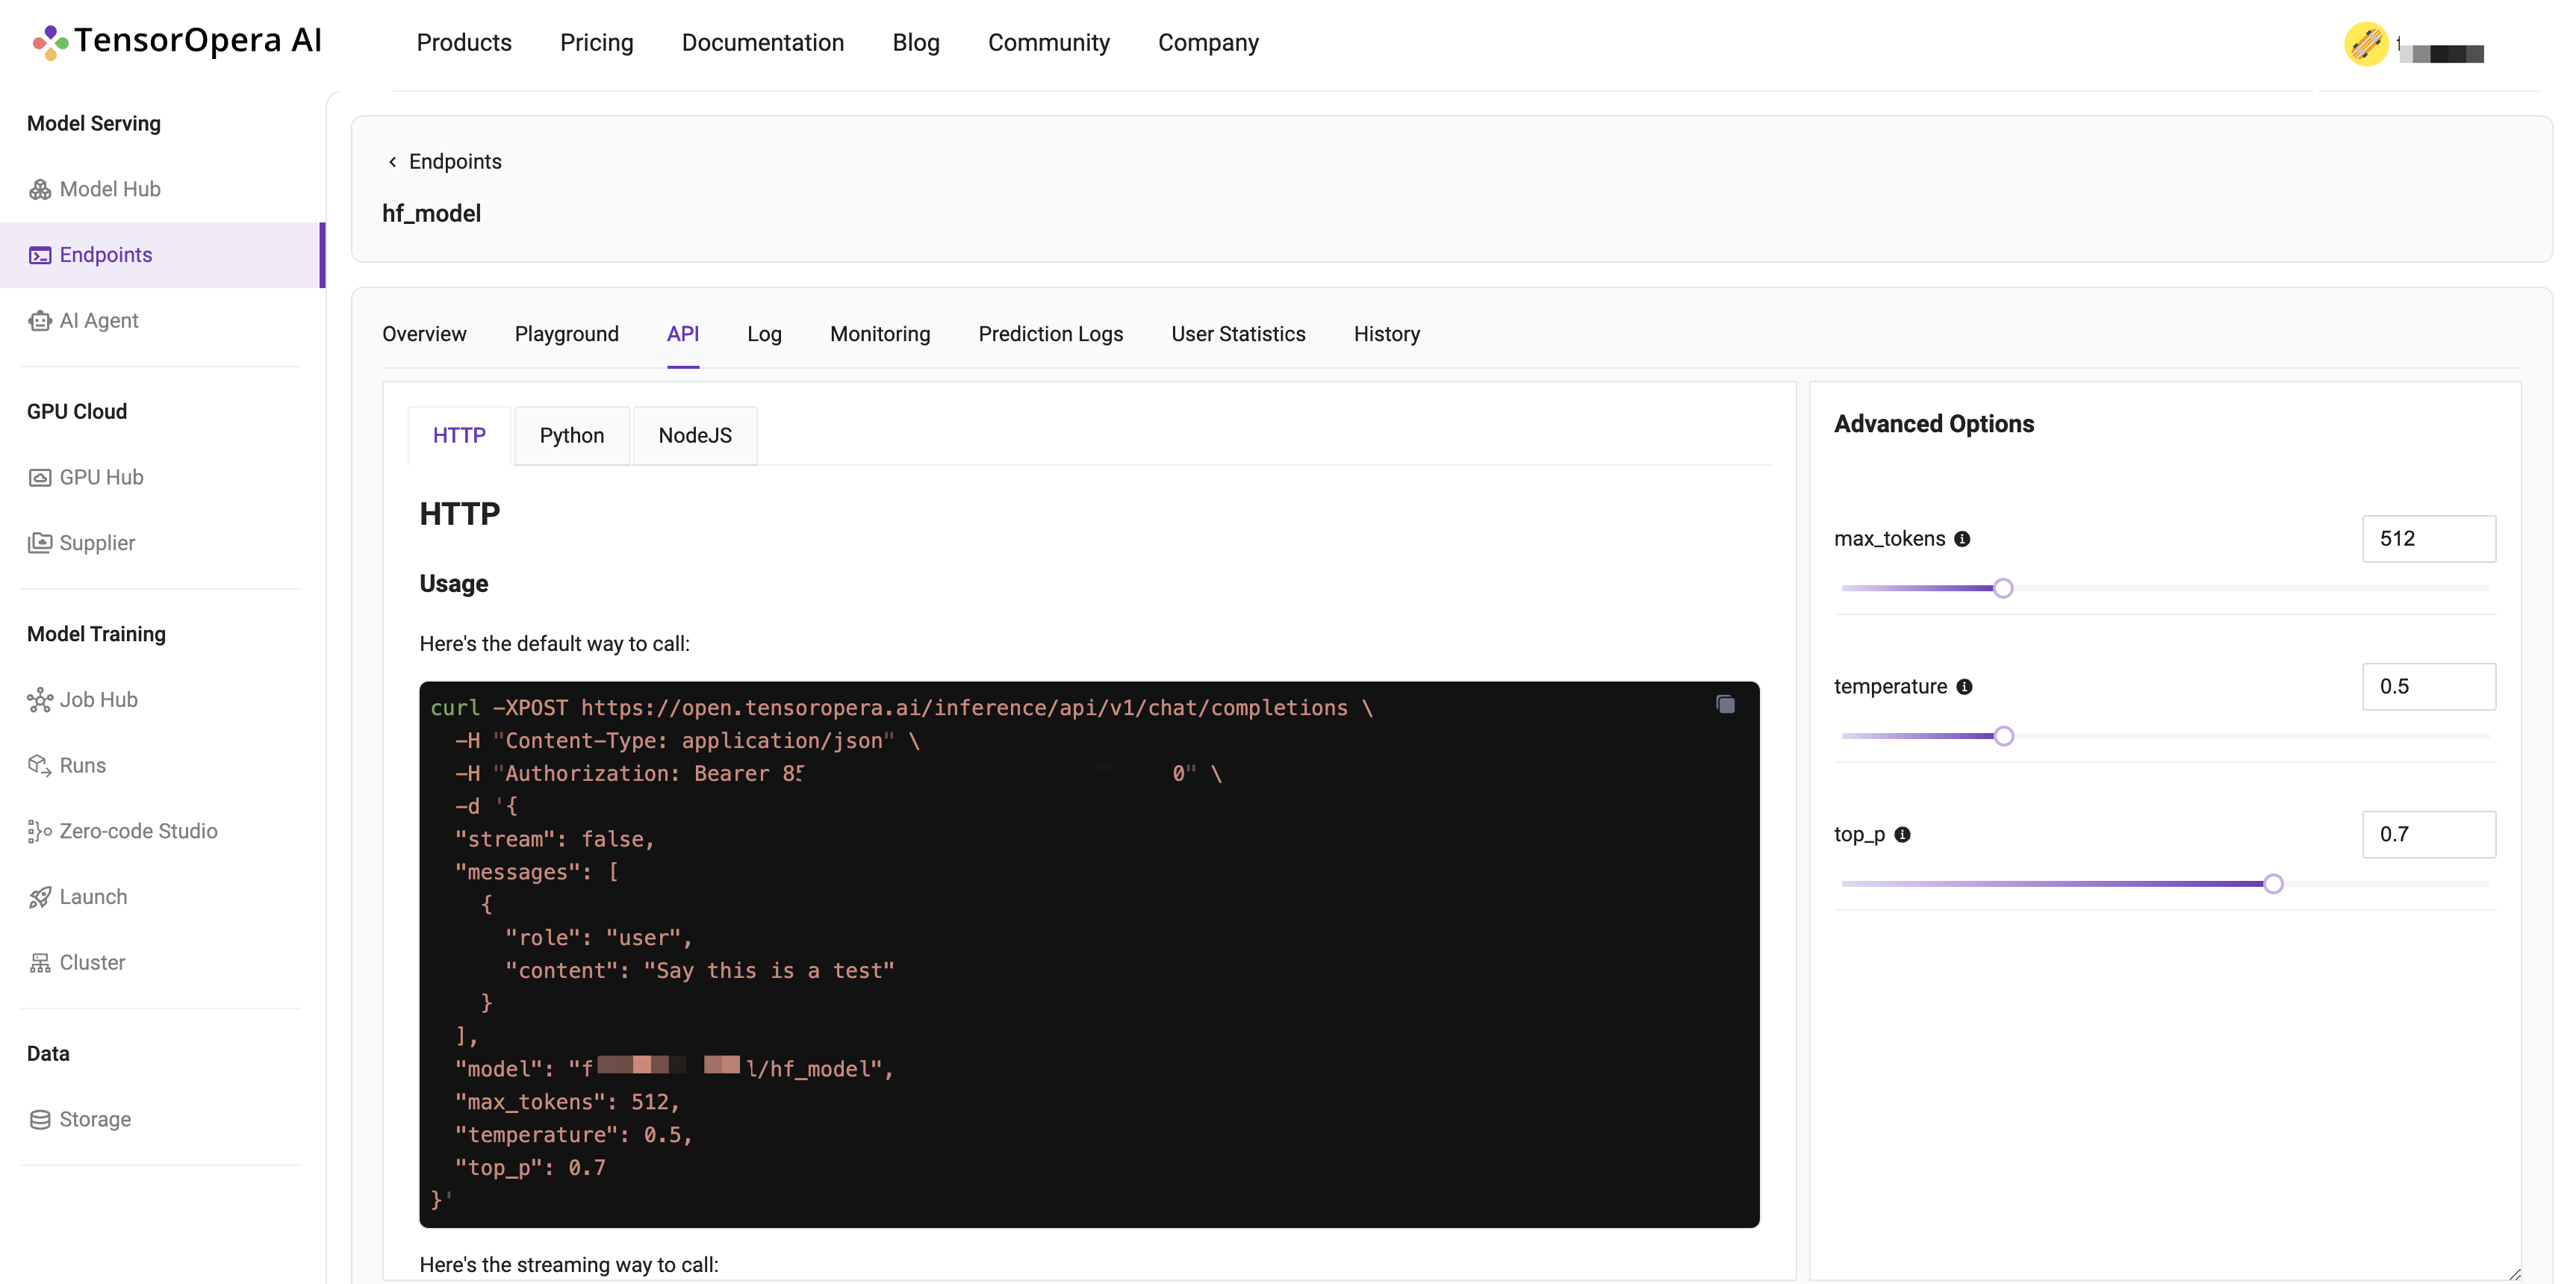
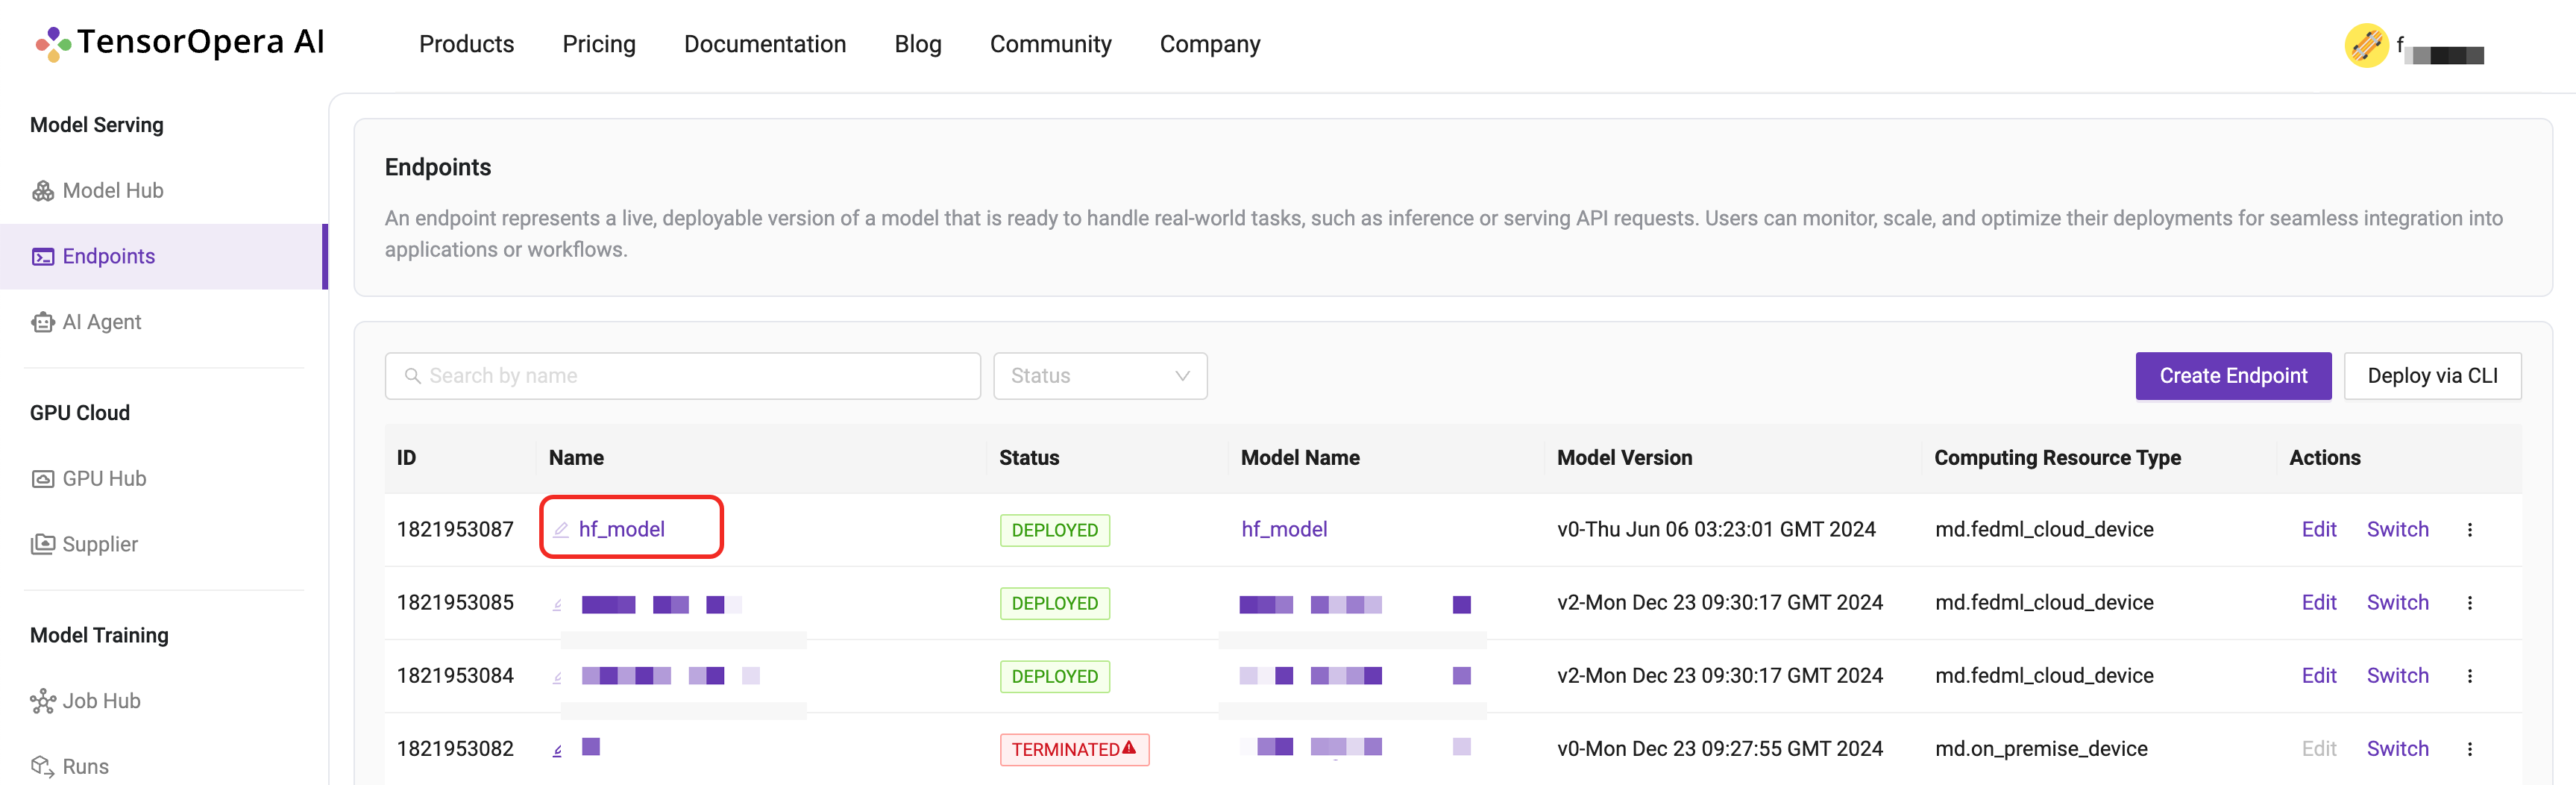
After few minutes, the model will be deployed to the serverless GPU cloud. You can find the deployment details in the Model Serving -> Endpoints tab in the TensorOpera AI Cloud dashboard.
You may interact with the deployed model by using the cURL, Python, or JavaScript command under the API tab.